Send emails using filter
From the main License Manager panel, you cand send an email to specific customers (from a filter). From the top menu "Main --> Send email --> to all using filter".
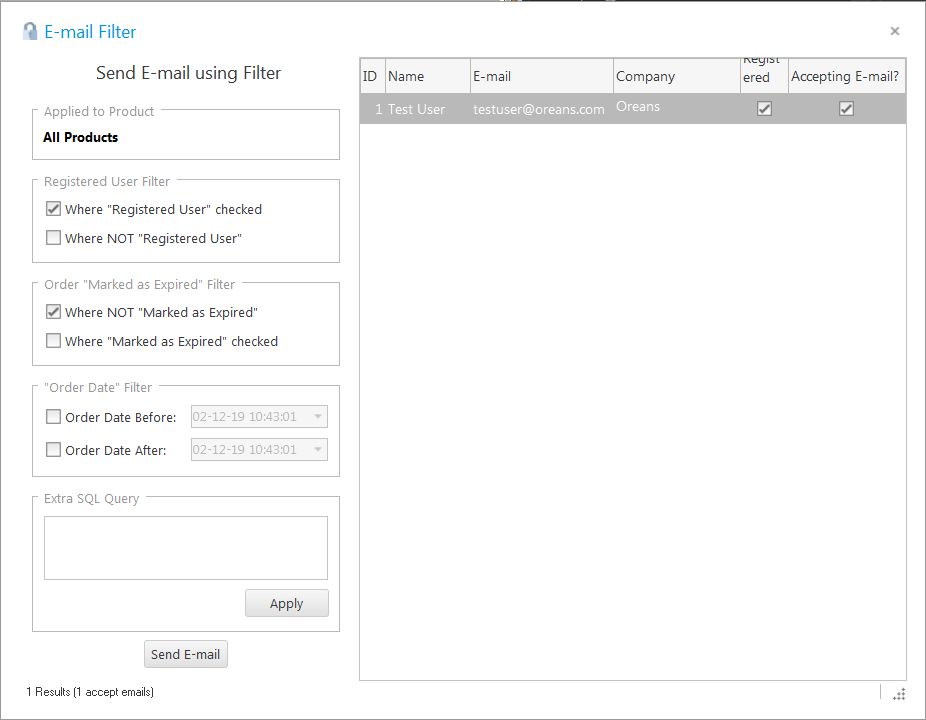
You can select specific filters to determine the clients that you want to send the email to:
•Where "Registered User" checked: When adding/editing a customer, there is a "Registered user" checkbox. This option filters customers that have that checkbox checked.
•Where NOT "Registered User": When adding/editing a customer, there is a "Registered user" checkbox. This option filters customers that have that checkbox unchecked.
•Where NOT "Marked as Expired":When adding/editing an order, there is a "Marked as Expired" checkbox. This option filters orders that have that checkbox unchecked.
•Where "Marked as Expired" unchecked: When adding/editing an order, there is a "Marked as Expired" checkbox. This option filters orders that have that checkbox checked.
•Order Date Before *date*: When adding/editing an order, there is an "Order Date" checkbox. This options filters orders that have an "order date" before the specified date.
•Order Date After *date*: When adding/editing an order, there is an "Order Date" checkbox. This options filters orders that have an "order date" after the specified date.
•Extra SQL Query: The selected items above will generate a SQL query to retrieve the desired entries, with this option you can extend the SQL query. For example, if you also want to filter for orders that have the string "premium" you can add the following entry: AND Order_RegistrationContent LIKE '%premium%'
To know more about the specific table and column names used by WinLicense, you can go to the top menu "Database --> Manage".
Template Manager
The E-mails Manager can be accessed from the top menu "E-Mails Settings-->Template Manager". From this form, you can create emails template to be selected when you are going to send specific emails to your clients.

In the email body, you can insert specific macros that will be replaced at a later time with the specific value. You just need to double click on the specific macro and it will be inserted in the email body at the current cursor location.
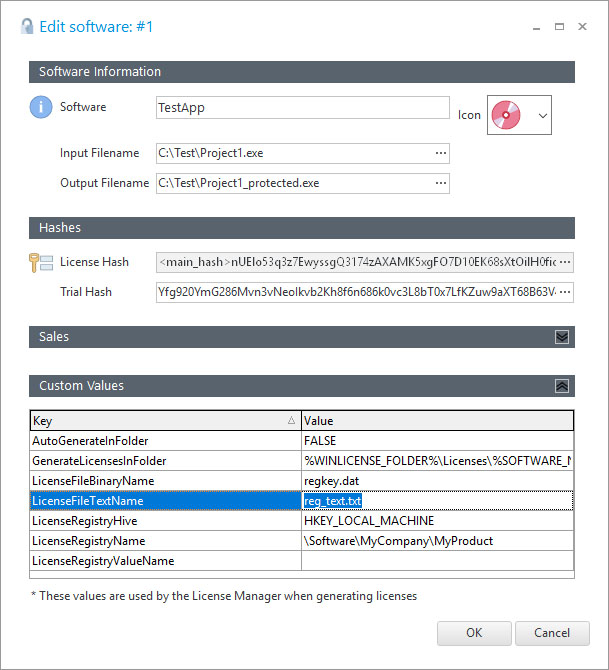
If you are going to attach the generated license file via email, you have to make sure that you have defined the key "LicenseFileBinaryName" in the "Custom Values" section (in the Software panel). In case that you are attaching a text key (instead of binary file) you have to define the key "LicenseFileTextName". Example:
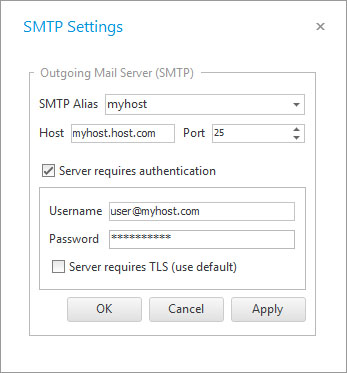
SMTP Settings
The E-mails Manager can be accessed from the top menu "E-Mails-->SMTP Settings". From this form, you can set your SMTP settings in order to be able to send emails to your customers. Make sure that you write the correct values according to your email server.
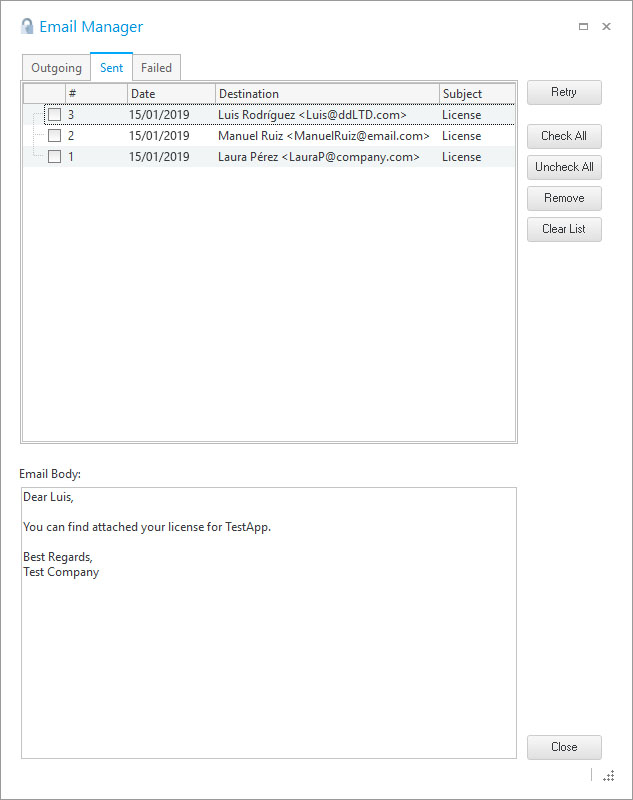
E-Mail Manager
The E-mails Manager can be accessed from the top menu "E-Mails-->E-Mails Manager". This option will display a new form where you can see a panel with of all your emails that have been sent and emails that have being explicitly queued or failed to be sent. You can send and re-send emails from this panel.